Friday, February 1, 2013

Sale-a-bration!

It's the most wonderful time of the year.......

SALE-A-BRATION!!!

Just check out the fabulous cool things you can get for free this year!  I love them all!  They are must haves for any and all stampers out there.  So there are more reasons then ever to host a party with your friends!

Message me today to book yours!


Glittery Hugs

Kathryne

Monday, January 14, 2013

First Brain Injury Class of the New Year

Happy Happy New Year! 

This is the first Brain Injury card class for 2013 and I am very excited to get back into the groove and so is my side kick my Crafty Kitten Presley!

We have been busy in the craft room designing and playing with the new products!  Exciting!

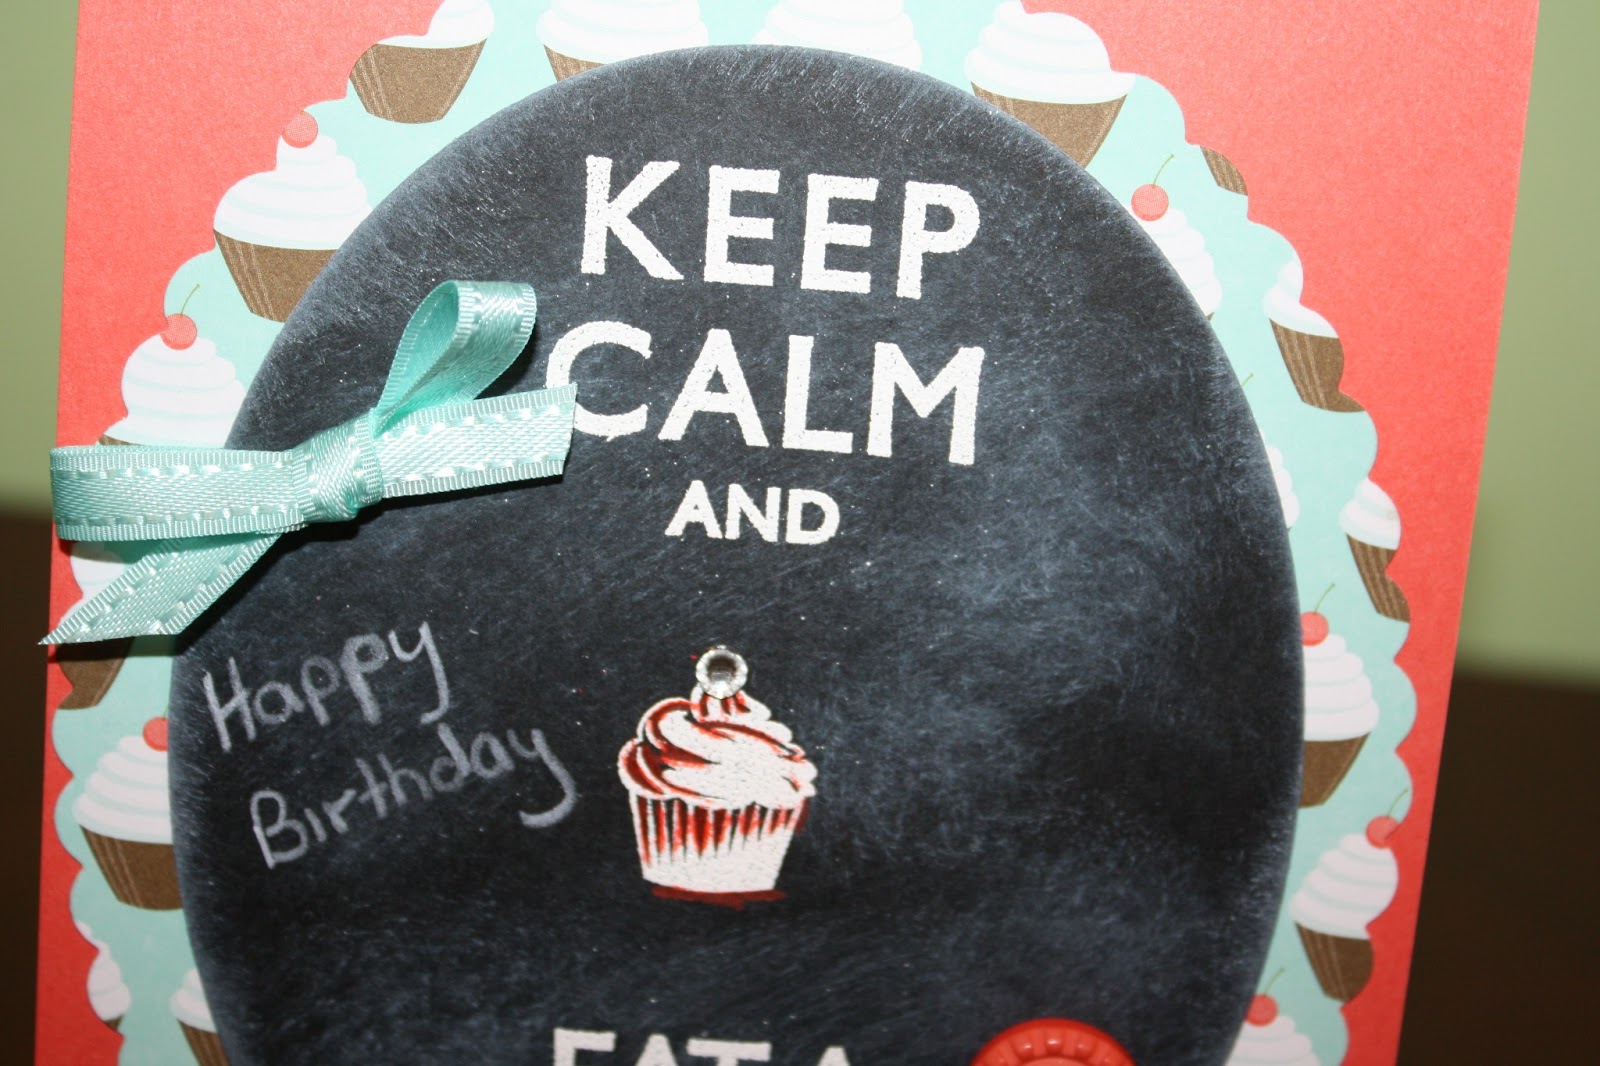
So the first card has a technique that I have been dying to try for quite awhile now  the chalkboard technique.  I am not sure why I have not done this before, but you can be sure you will be seeing some wide variations coming up in the next couple of months.

Of course these cards are simple on the skill level scale but beautiful all the same.

I love this stamp set.  You can see the "Keep Calm" sentiments in everything from clothing to art work and now in my creations.  You can get this one with your hostess dollars from Stampin UP!  

To create this card I used the new Ovals Famelits to cut a piece of Basic Black card stock for the chalkboard.  I used retired DSP with a cupcake pattern and the largest Oval that has a scallop to it and adds some wonderful detail .  

To achieve this simple chalk board effect I first used my embossing buddy all over the the black layer.  I arranged the stamps on my clear block to fit into the space of the "chalk board".  I used Versa Mark to stamp the sentiment and then used white embossing powder and the heat tool to set .  Set this aside and let it set some more.  Next I used a tissue and some Whisper White ink to create the "chalk dust" just smudge it around on the board.  I used the Stampin UP! coloured pencils to add some corresponding colour, in this case I chose the one that was closest to Calypso Coral which is the base of my card.
Next I added the words Happy Birthday with a white pencil crayon.  You can add more white hand drawn items at this point or you can add more stamps to enhance your image.

I used the sale-a-bration item!  EEEEK!! yes I said Sale-a-bration!  Ribbon and button kit.  Such pretty colours and so versatile.  Wait until you see the rest of the Sale-a-bration items available this year.  

The Ribbon is Pool Party and the button is Calypso Coral. You are definitely going to want this set.

In this picture you can see how the dust effect looks close up.

The Next card is a sympathy card.  Our community has been hit very hard so far this year with tragedy hitting us so it seemed appropriate that we do a sympathy card and unfortunately necessary.

This one I made for a friend to give to a family friend who tragically lost their daughter on New Year's Eve.  This is a stepped up version of what we  are doing in class this week.  This one starts with a base of Perfect plum then the next layer is Marina Mist.  The Marina Mist layer is stamped with the background stamp EnFrancais in Marina Mist Ink.  The next layer is Very Vanilla and I used Stampin Write markers in Perfect Plum, Old Olive and Marina Mist, to colour the large flower stamp from Elements of Style.  Next you "huff" or blow on the stamp to re-activate the ink.  I let it dry a minute then ran the panel through the Big Shot with the Elegant Embossing folder form the Holiday Catalogue, so pretty!.  Next I tore the edges of the panel in a random manner and sponged with Early Espresso ink.  I then used a scrap of Very Vanilla to Stamp the sentiment in Perfect Plum and punched it out with the oval punch, then sponged with Early Espresso ink.  The scallop oval was punched from from perfect plum as well.  The Very Vanilla layer was then popped up using dimensionals and the whole thing was adhered with tape runner.
At the top of the card I cut a small slit on the edge to allow me to thread the Basic Grey satin ribbon through to add some detail.  Inside I stamped the branch from Thoughts and prayers too and one of the sentiments in Perfect Plum.

The last touch was to add some dazzling diamonds to areas on the flowers to just give it a bit of shine.  
I have made this card before without tearing and in more masculine colours and used the lattice embossing folder and it also gives an amazing effect to the card.

Next Up!  Butterflies.  Everyone knows how much I love butterflies.  I can never get enough!  This card is full of texture and shine.
The base is Melon Mambo and it was run through the Big Shot with the Polka Dots embossing folder.  The Butterflies were cut out with the Sizzlet butterfly that cuts and embosses.  I layered the butterflies with Melon Mambo and Pink Pirouette.  The next layer is Pink Pirouette and was run through the Big Shot with the elegance embossing folder from the Holiday Catalogue.  The Whisper white layer was cut with the large scallop Edgelit and then embossed with Delicate Designs folders such a beautiful effect and, I am ashamed to say this is the first time I have used it.  The ribbon is from another site but is so pretty with its polka dots and scallops it just worked perfectly with my card.  And this card features another Sale-a-bration item.  The mini label punch is so stinking cute!  And there are matching stamps not only as a sale-a-bration item but also in the New Spring Catalogue!  Check them  out in the link to the side.
This next card is so adorable and I know my oldest son is going to love one for sure!  He is crazy for bee's and I try and make him only Bee Cards so this one made me think of him.

How cute is this one??!   I started with a Cherry Cobbler base and ran it through the Big Shot with the cool new Hexagon embossing folder.  Next I used the Adorning Accents Edgelit to trim the edge and create a cool effect for the stamp on the inside of the card.  I stamped two bees on Daffodil Delight with Staz on ink.  I fussy cut the bee and then just the wings on the second Bee and popped the wings up with dimensionals.  Of course I had to add some dazzling diamonds to the stripes of the bee.  I stamped the saying on Whisper White scraps and created a banner.  Then I used a scrap of Daffodil delight to add a highlight to the banner.

The inside panel was cut the same size as the base and I stamped the bees in Staz on.  The sentiment inside was first stamped in Daffodil Delight and then off set slightly in Staz on.

I added some cute Black Gingham ribbon to finish it off.


I hope you enjoyed today's post and tutorial!

Glittery Hugs,

Kathryne

Sunday, January 6, 2013

Cute Monsters!

Look at what my crafty kitten made!  My daughter loves to craft sometimes - today was a crafty day!  And a lucky friend got these cute Monster thank you cards for her sons 1st birthday party.  I thought they deserved a post they were so adorable.


They are just the cutest!  Great job my crafty Kitten! xo

Coming this week on Crafty Kat Creations!  The new mini!!!!  Look for some new creations from all the yummy new things available!

Glittery Hugs

Kathryne

Thursday, January 3, 2013

Installing a cool new Tool

Follow my blog with Bloglovin

This is not a regular post. I am installing a new blog tool called blog lovin'

Wednesday, December 19, 2012

Just a Few of the Cards I have Been Working On

Time is going by so quickly!  I am not sure I will get all I wanted to get done before Christmas this year!  I am not going to stress out though.  Its been a long few months and I just did not have the time I usually had and I just dont have the energy right now either so I am going to do what I can and give myself a break on the rest! 

I hope you enjoy checking out what I have been working on...

First up is a card that fits into a business envelope its base is 8x9 and scored at 4"  I used Whisper White ink and the Snow Flurries snowflakes and then embossed with White embossing powder to enhance the images.  The Image is the Star Tree in Whisper White then embossed with iradescent Ice so pretty!  Apothecary Accents was used to make the tags and then I used the paper piercing tools to outline the tags then the white gel ink pen!  The card turned out so cute!! Cannot wait to give this one to someone.

Another Star Tree!  This time embossed with Silver Embossing powder and combined it with Be of Good Cheer and a little Tulle Ribbon!  Wild Wasabi and Cherry Cobble are the accent colours

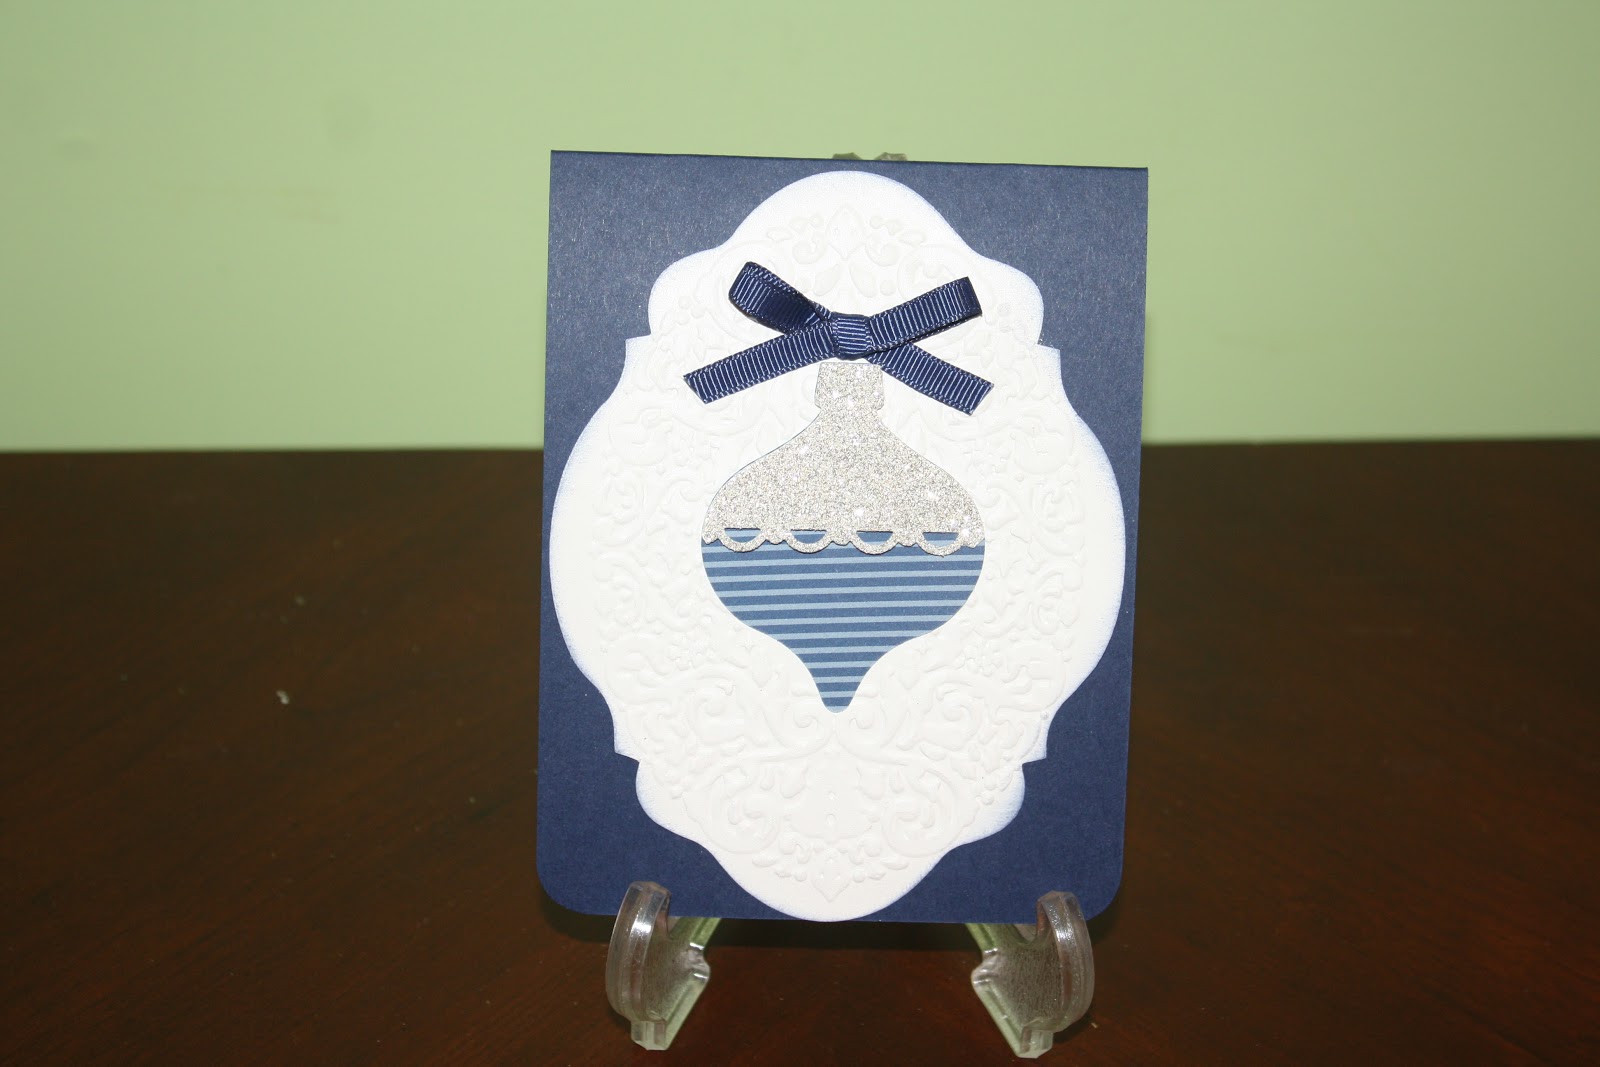
This is a great and quick little card with the Ornament Framlits and DSP not to mention Silver Glimmer paper!   I also added some Vanilla Smooch spritz to add more shine.  My daughter and I have made several in various colours!  Great for making a  lot of cards all at once!


Well, break is over  back to the craft room for more creative fun!  Watch for more posts soon

Glittery Christmas Hugs,

Kathryne

Monday, December 10, 2012

What a Fantastically Crafty Afternoon!

Today was the 4th Annual Crafty Kat Creations Christmas Card Class and we had so much fun!  I met two new crafty friends who got the experience the thrill of crafting with me and my crazy friends!  We rocked it today with our Christmas cards!  And I love when people take my design and make it their own or we get to challenge our creative selves to cover up errors!  We did it all and more today.  There was glitter head to toe and Christmas Music and Treats and just so much fun.  I felt so blessed to feel well enough to hold the class and make it through as well!  Things are looking up.

Enough blabbering along.  Here are some of the cards that we created during our time together.
Up first Pink Pirouette Christmas.  The Base is Pink Pirouette and it is run through the Big Shot with a sizzix Embossing folder then sprayed with spray glue and glitter ritzed with Pink lilac!  So beautiful.  I then used my favourite Stampin Up Ribbon around the card.  Then we cut out the Christmas Tree with another Sizzix Die and matching embossing folder with the new amazing Coredinations Cherry Cobbler paper from Stampin UP!  We sanded that image to get to the velvet like layer and give it the distressed look and added several sizes of the Stampin Up pearls.  We even added matching snowflakes to the inside to dress it up!  Quick card to make with lots of wow to it!  A couple of members were  not big on the pink so they did the base in Gumball Green and it looked just as amazing so there are many options for this card!
Next up is the Starry Nights Card.  The base of this one is Gumball Green  just loving this new In Colour and so happy I get another year with it too!  If you know me at all you know my love of all things green and pink though!  Hint on the colour scheme for the new Craft Room!  So for this one we started on the inside with a piece of Very Vanilla card stock from Stampin UP!  and used the Frosty Friends Stamp from the Holiday Mini stamped in Staz ON then we coloured our little Snowmen with Water Colour Wonder Crayons and the fantastic Blender Pens.  We added a little Dazzling Diamonds with the Two Way Glue Pen and  used the Pinking Hearts Punch to trim out the edge.  I used a piece of DSP from Be of Good Cheer to finish off the inside. 
Plus the Saying but out with the Apothecary Accents Sizzlits! 

Next we stamped the Christmas tree from Scentsationals Stamp set and Merry Christmas from the Four Saying Stamp set  Also cut out with a different design from Apothecary.  We used the three heart punch and red Glimmer Paper to create a cute accent for the back of the card and to attach the Red and White Bakers Twine to help close the card.  These were attached with a simple silver brad.  Next we used the corner rounder to accent the front of the card and a Martha Stewart all over the page punch which I must say is cool but does have a learning curve to it and is not for those of us who scare easily - it's very loud when the magnets click in place.  We backed this with double sided wide tape and used retired Stampin UP glitter in red to bling up the stars.  This card is a little more time consuming but is fantastic when it is done!  And for those that love to colour it is very relaxing as well.

The Next card is actually one I have done before but I changed it up a bit with a colour change to Pink Pirouette and we used the Silver Glitter Paper and Platinum Shimmer paint to make this one shine!  Not to mention the Snow Flake Trio embossed image too!


 Hello Sparkle!
 Pam and her awesome Daughter Ashley having fun!

Bev and my Mom but where did Momma go!  Ugh  and the other pic is blurry  :o(  Sorry Mom!

Thank you so much Ladies for coming out and enjoying the day with me!


Oh and last but not least the ever talked about Tea Light Card!  Yes you add a tea light to this card and it shines through the vellum card stock!  So stunning!  This card might get put on display for years

Look at how cool the Tulle from the Holiday Mini is!  I hope this is a keeper but you never know!  It's great to work with though  love it!

Glittery Hugs

Kathryne

Tuesday, December 4, 2012

Sneak Peek for the Christmas Card Class

So I did get busy in my craft room today and I am too excited to keep the cards to myself.  So I am offering a Sneak Peek of a couple of cards we will be making on Sunday for all of  you who were able to get a spot!  I may have a second class as well if everyone is game!

EEEKKK  this is so stinkin cute I cannot stand it!  I took some inspiration from Michelle Z and then added my own twist!  I hope the girls will love it.  We will be making a Version in the upcoming Brain Injury Christmas Card Class as well.
The secret is....... I used Peppermint embossing powder so you can smell mint when the person opens up their card!  YUM!

Next up....  How about some Bling!!  With some Shimmer and some Glimmer this card is rockin!   Cannot wait to share all the details with everyone.  

Glittery Hugs,

Kathryne

Sunday, December 2, 2012

Fun with Friends!

It has been a long hard 6 months for me.  A few days ago I got to go out for dinner with my amazing fiance and my sister inlaw and her boyfriend.  It was only for a couple of hours but was heaven!  It felt so good to be able to go out and not be in pain or feel completely horrible!

Today I was allowed to drive again!  Not only did I get to go to my Sons hockey game but I was feeling ok to go and create some cards with my good friend Stephanie!  It was the most incredible day I have had since July!

Here is the Winter Wonderland we created at Lasting Impressions 


There is just something about White on White that is so Elegant.  We came home covered in glitter - just the way it should be

Glittery Hugs

Kathryne
I have had a few people as me about my work with the Brain Injury Association of  Sarnia and I thought I would share with you some of the cards we have made over the last couple of months.  This is one of the most popular activities available  for anyone who wants to come out and be with friends and let out some of that creative energy too!


 This First one is actually a sneek peek we are making this week! Using Snow Swirled still one of my favs!
Framelits Ornament in Pool Party with the new Framed embossing folder from the Holiday mini!!

This one is made with the Snowflake embossing folder and the beautiful new Snowflake Bigz Die!  Love it!  And who does not Believe in Snow

 This one is a card using the dryer sheet technique!  This one is fun to make and great use of those used dryer sheets too.  You can not see all the glitter on this one but it is stunning!  The Tree is from Lovely as a Tree  this is the oldest stamp set I own and its still going strong with Stampin UP!  
 Scenic Scene with Whisper White Ink and Iridescent Ice just stunning
 Loved this card and its not just for fall.  We used the great new Framlits to cut out the leaves from Wonderfall.
 A beautiful and simple Card with the Lacy Brocade embossing folder in Cherry Cobbler teamed with Early espresso, some Dazzling details and the new Scalloped Tulle ribbon.

The Holiday Frame with the new Cherry Cobbler Cordinations Card stock!  LOVE LOVE LOVE!!!  Simple and pretty.

Hope you enjoyed what the clients have been working on!

Just a reminder that 5% of all orders through me go to help fund programs for clients and education surrounding Traumatic Brain Injury!
Thank you all for helping raise funds this year!

Glittery Hugs!

Kathryne


Friday, November 30, 2012

Hello My Friends!!!
I know its been way way too long!  There has been such drama over my health that it was just impossible for me to create and keep up with everything!
So  I tried to make sure that my Brain Injury Group was well taken care with the help of my lovely assistant Presley!  Thanks Hon for helping hold down the fort during all of this upheavel!  Could not have made it without you.  

Thankfully I am feeling well enough to take over again and to get back to my love of creating and blogging!  The first thing will be My 4th annual Crafty Kat Creations Christmas Card Class!!  It is coming up quickly next Sunday!  So I have a few days to prepare.  For now I am posting some creations I made for the Brain Injury group here in Sarnia and later I will post a sneek Peek of the Card Class too!

So happy to be back and blogging again with all  my friends so I am now off to check out all of my creative friends blogs that I have so so missed!!
Glittery Hugs

Kathryne